
Creating Your Own Master Control Panel
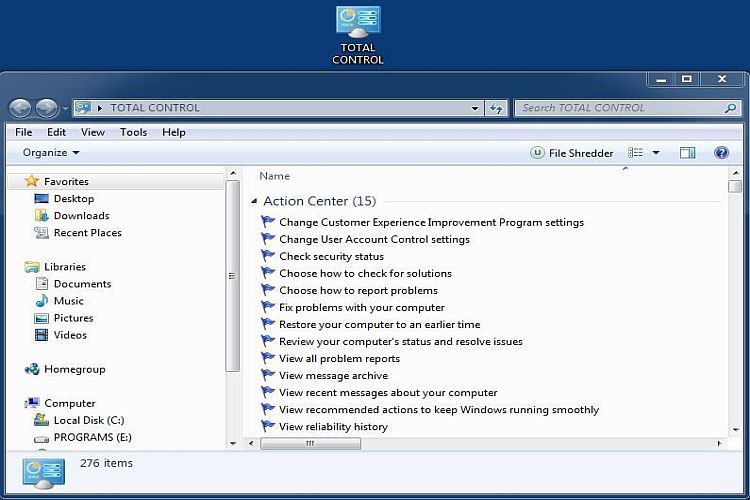
I'll call it TOTAL CONTROL but you can call it anything you like. Use your name if you want, maybe Mike's Control Panel or Mary's Control Panel. It does not matter what you call it, what matters is what it can do and how you go about creating your own master control panel. The first thing to remember here is that this folder you would create requires metadata from within the Registry Editor. That said - if you EVER intend to make any changes to your Registry you should definitely back it up first. There is no need to make any changes in the Windows Registry to create this control panel, it is just a matter of using the correct data from within. For that matter, you would only need to copy and paste the data which will be presented in the next paragraph. Just below is an expandable image of what the control panel you would create looks like along with the icon, just above it. Notice there are 276 items listed (in this Windows 7 version) and the groups of control items are listed alphabetically.
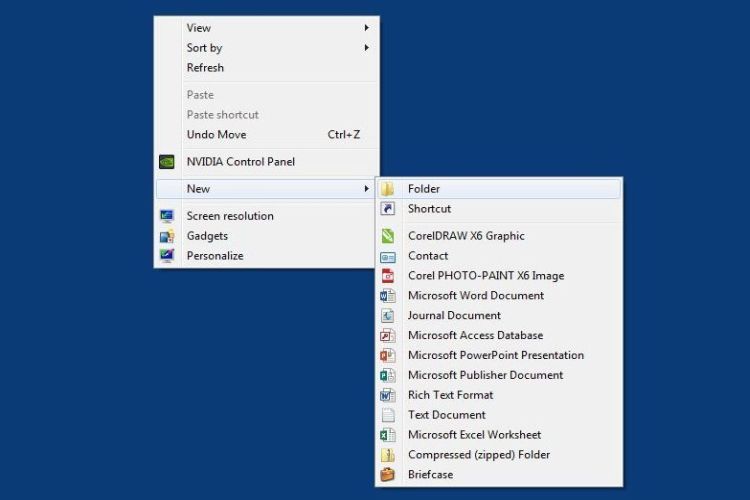
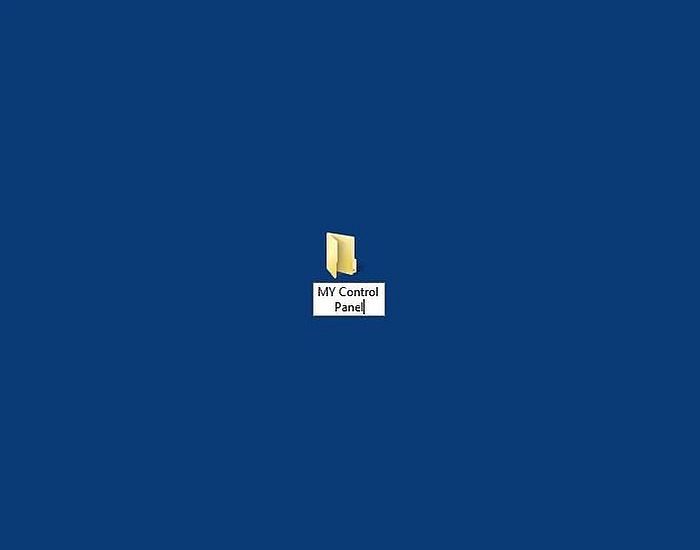
To be clear - you do not need to enter the Windows Registry to do this - and if you're not comfortable working in the Registry, please don't. Mistakes made there can have nasty consequences. All you need to do is start by creating a new folder on your desktop (right click on the desktop, choose New, then choose Folder). When you do that it shows up on your desktop with the "name field" displaying the name "New Folder". If you do nothing else immediately you can then place your mouse cursor in that highlighted New Folder field and change the name of the folder, but if it did become named New Folder you can just right click on it and choose Rename. Once you know what you want to name this folder, type it in the name field but add the following line of metadata right after it: .{ED7BA470-8E54-465E-825C-99712043E01C} without a space in between. The name of my folder is TOTAL CONTROL.{ED7BA470-8E54-465E-825C-99712043E01C}. The slideshow below shows the steps taken to create your own master control panel.


Creating Your Own Personalization Control Panel
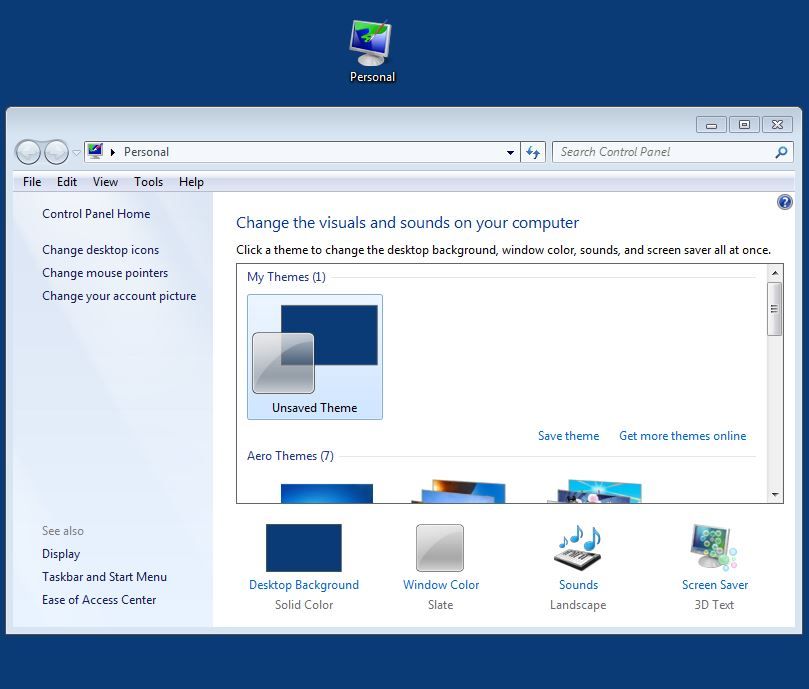
What has been created is basically a shortcut to all program tasks within Windows, in this case named "MY Control Panel". Since some may find it useful it makes sense to show how it's done and there are even more options for creating other similar shortcuts even if just for fun. Let's say for instance that you like to change the appearance of your desktop regularly. Hey some folks like to rearrange furniture often right? Well, if you wanted, you could make your own personalization control panel just as easily. For your own personalization control panel the metadata to use would be .{ED834ED6-4B5A-4bfe-8F11-A626DCB6A921}, and below is what it looks like.
Now there is the question of how one knows how to do this. As mentioned it is a matter of using metadata from within the Windows Registry and finding that data is not difficult. It's been years since I first learned about it but what I did was search the Registry Editor for "All Tasks" and that locates the correct registry entry. In the same vicinity can be found other such metadata, including what was shown for personalization. To do this just hit your start button, choose Run, type regedit and hit enter. Then you'll see the Registry Editor in all its precarious glory. MAKE NO CHANGES and you would be fine. Make a mistake and maybe not so much. So please don't. Just copy that metadata previously shown, follow the procedure and have no worries. Just make yourself your own master (or personalization) control panel.