Replacing The Power Adapter Port For A Dell Inspiron 11 3000
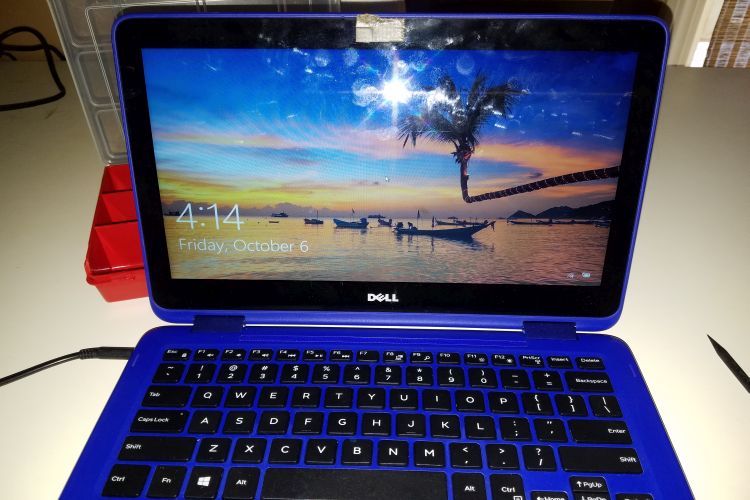
Dell has typically done a very good job over the years with designing Computer towers and laptops and they're generally easy to work on. The Dell Inspiron 11 3000 is no different in that respect, but what happened to this machine made me wonder about one thing in particular which is the location of the Dell Inspiron 11 3000 Power Adapter Port. It is located on the side of the unit as opposed to the back and due to that the power cord was tripped over resulting in the damaged Power Adapter Port. Regardless of that and no matter the reason, if the damage is done it must be replaced. This won't be very difficult and only requires a few tools to accomplish, namely a small phillips screwdriver and a plastic or composite scribe (tweezers tend to be handy as well). Always proceed with caution when working inside any computer and if you use something other than a scribe be even more careful when separating the base cover. Now let's go over what has to happen when replacing the power adapter port for a Dell Inspiron 11 3000 computer.
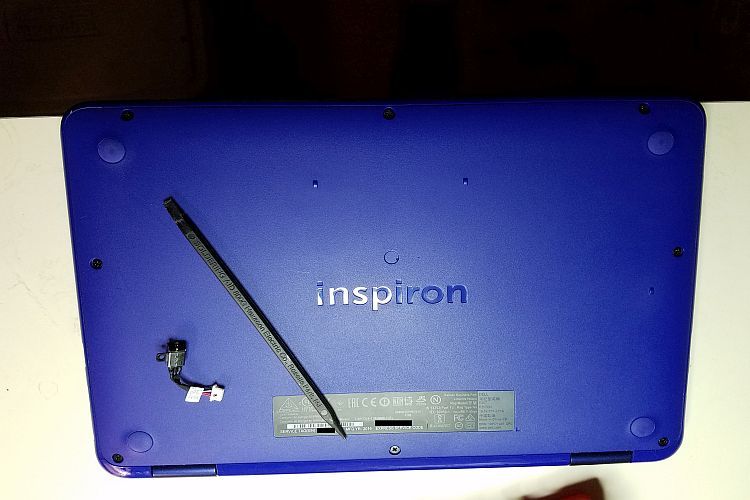
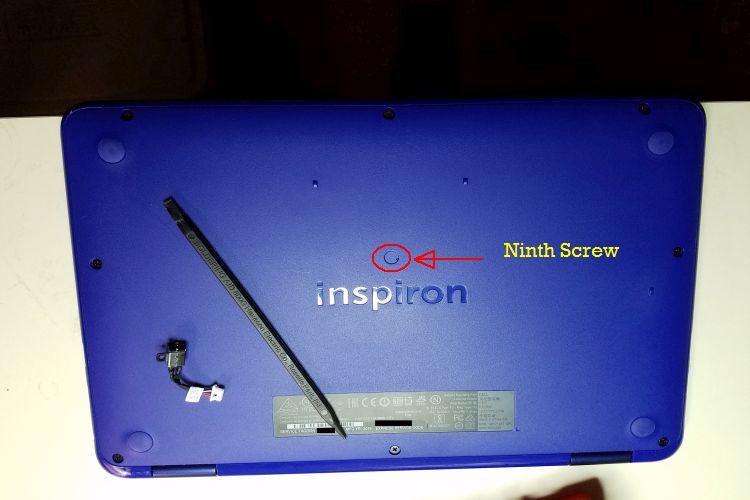
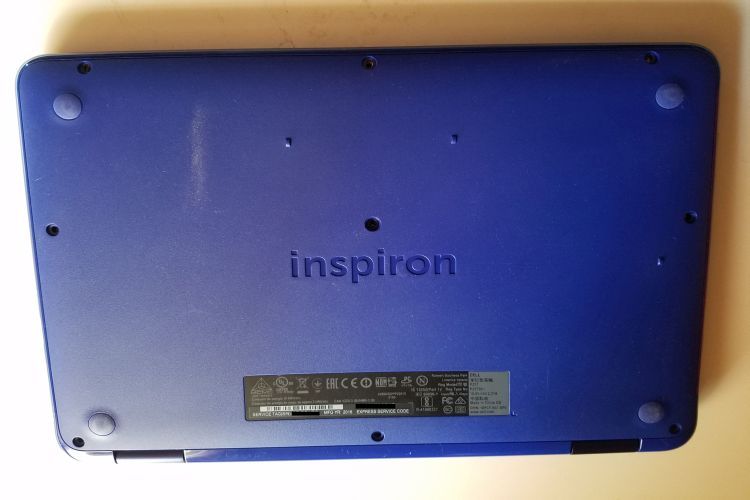
Seeing this damaged power adapter port it's not hard to notice that there is no "center pin" evident because it's mashed together with the rest of the adapter so there is no way power can be applied from the actual power adapter. Time to replace the power adapter port without doubt. In this case, unlike many others, it is just a small part mounted with a single screw which plugs into the system board. Luckily it is not soldered on which would make things a little more complicated. Here's how to proceed: Look at the base cover and note there are eight screws clearly shown, as well as a ninth screw which is hidden by a tiny thin plastic screw cover. That screw cover can easily be removed with a scribe or tweezers to reveal the ninth screw. Once all nine screws are then removed the base cover can be separated revealing the inside of the Dell Inspiron 11 3000 computer. Have a look at the images below which illustrate the ninth screw and all screws removed.
Now the part where caution must prevail in order to protect the base cover and the rest of the Inspiron 11 3000 chassis. When the nine screws are all removed the base cover needs a little coaxing to separate from the rest of the chassis. The scribe is the prescribed tool to accomplish this because it is not metal, has a fairly sharp edge to penetrate the seam, and can allow leverage to create the necessary separation. See the next image depicting exactly where to insert the scribe to begin that separation.
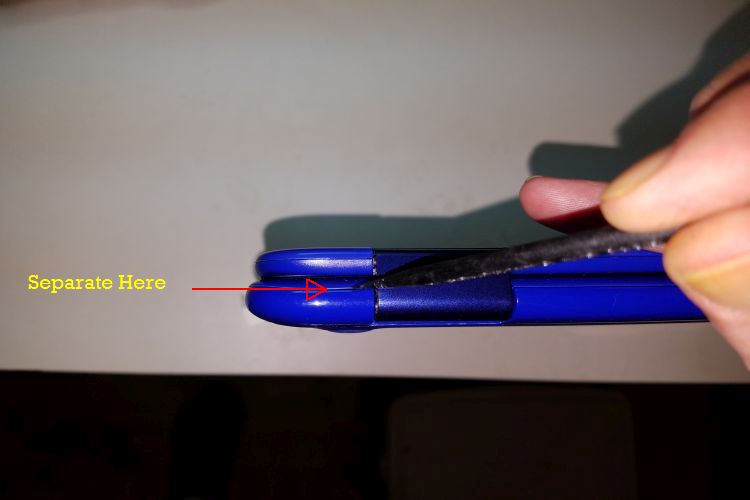
The exact spot shown here is to illustrate the seam precisely because that is where the separation will occur. You might find another spot around the chassis which opens up fine but it MUST be on that seam. Once you get that scribe to penetrate the seam just work it open a bit then go around the chassis carefully opening it up all around remembering there are tabs involved although those do not present a problem. Just lift incrementally around the entire machine and then separate the base cover. Now you have full access to the interior of the Dell Inspiron 11 3000 computer.
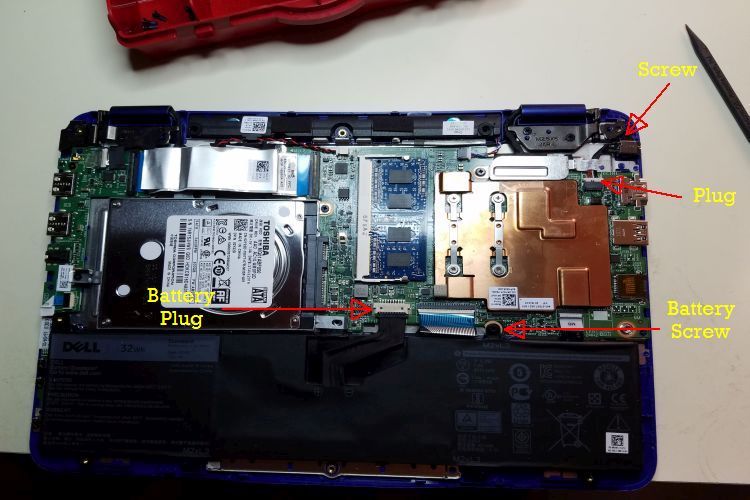
Always remove the battery as soon as it's accessible which would be now. You might not consider it necessary but it is the Industry accepted best practice. Remove the screw and the battery connector indicated above, remove the battery and then see the blow-up below of the Dell Inspiron 11 3000 Adapter Port.
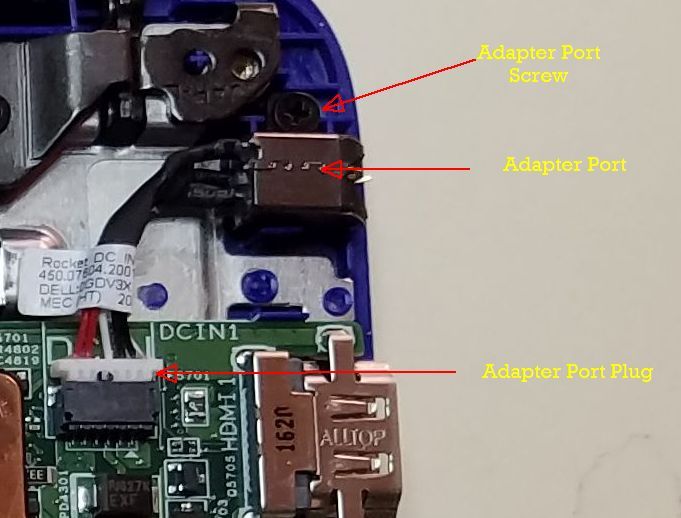
It's that easy. Remove the screw, unplug the connection at the system board and remove the damaged adapter port. Then simply place the new adapter port in the same way, plugged in and screwed in and put the battery back as it was. Now it's just a matter of reattaching the base cover by just slowly and carefully matching it's position and pressing down to re-engage the tabs (which are easy). Replace all nine screws and the ninth screw cover then you're finished replacing the power adapter port in your Dell Inspiron 11 3000 computer! Now it works again :-)